When I first started thinking about what I wanted to do for this project, what I really wanted was something that would not be a waste of space. I wanted it to be something useful, something relevant to my identity and what I love. I wanted it to be something I would enjoy making and be proud to show other people that I had made.
I racked through ideas, but was wholly overwhelmed by the numerous choices possible and didn't really know how to design my own project. That felt like a step that I was not ready to commit to yet. I decided to seek advice and counsel on where to start and what to do. After getting some ideas, I decided to follow the model of the $10 DIY microscope stand that used smartphones to capture shots of the magnified images for my project.
The important aspect of making the project significant was incorporating a theme or political statement that gave the project purpose and uniqueness. I was a little bothered by the way that we covered feminism in our class, so I decided to take the chance of representing my beliefs on feminism in this project. Whether these are right or wrong is really irrelevant, but I felt that my understanding and connection with feminism and the issues that the group fights for were misrepresented in our discussions.
I also found the link between my microscope (a scientific device) and feminism, which was that females are significantly underrepresented in STEM populations and culture. I had my mind made up to make these my main points of interest for my project, but I wasn't entirely sure how to engage these ideas within the project. More ideas on that to come later.
Step 2: Finding the Supplies.
Without access to a car, and combined responsibilities at work and school made it difficult to locate and acquire the materials that I needed for this project although they were seemingly simple.

7" x 9.5" x 0.75" wood block for base
I found a wood block approximately the correct size at Michael's craft store. The hardware stores didn't have any scrap wood that was the size that I needed and I didn't want to buy an excessive amount of wood for a project that needed a 7" x 7" block for the base.

Plexiglass sheet 8" x 10" x 1/8"
I found this piece of plexiglass at a Lowe's store. It was the perfect thickness (~2mm) and its dimensions would allow for me to get a 7" x 7" piece and a 7" x 3" as well as an additional 1" strip that I could potentially use for scrap plexiglass or microscope slides.

2 wing nuts (5/16")
I found these at Lowe's hardware stores as well.

3 carriage bolts (5" x 5/16")
9 nuts (5/16")
5 washers (5/16")
I found all of these at the Lowe's store. I had originally picked out galvanized versions of all of these supplies, which are more expensive than the ones that I ended up getting. Thankfully there was an employee that came over to help me and told me about the differences. He explained that the galvanized ones were more for projects that would be outside and would be exposed to a variety of conditions and needed to be more durable.
Still need:
- laser pointer focus lens (use multiple for increased magnification)
- LED click light (necessary only for viewing backlit specimens)
----------------------------------------------------------------------------
 I found an LED light in my room!
Thank goodness for picking up random free things during the 'Up Your Ave' event. I'm pretty sure it was from the hardware store on the Ave. (Was it Ace? Maybe.)

Thank goodness for picking up random free things during the 'Up Your Ave' event. I'm pretty sure it was from the hardware store on the Ave. (Was it Ace? Maybe.)

Found a laser pointer at the Dollar Store!
---------------------------------------------------------------------
Budgets:
(made table)
---------------------------------------------------------------------
Step 2.5: Destruction of Materials to get Real Materials.

Look it lights up!

Red is not so bright... :(

And the destruction begins!!!

The casing
The buttons

Buttons! Springs! Metal things!

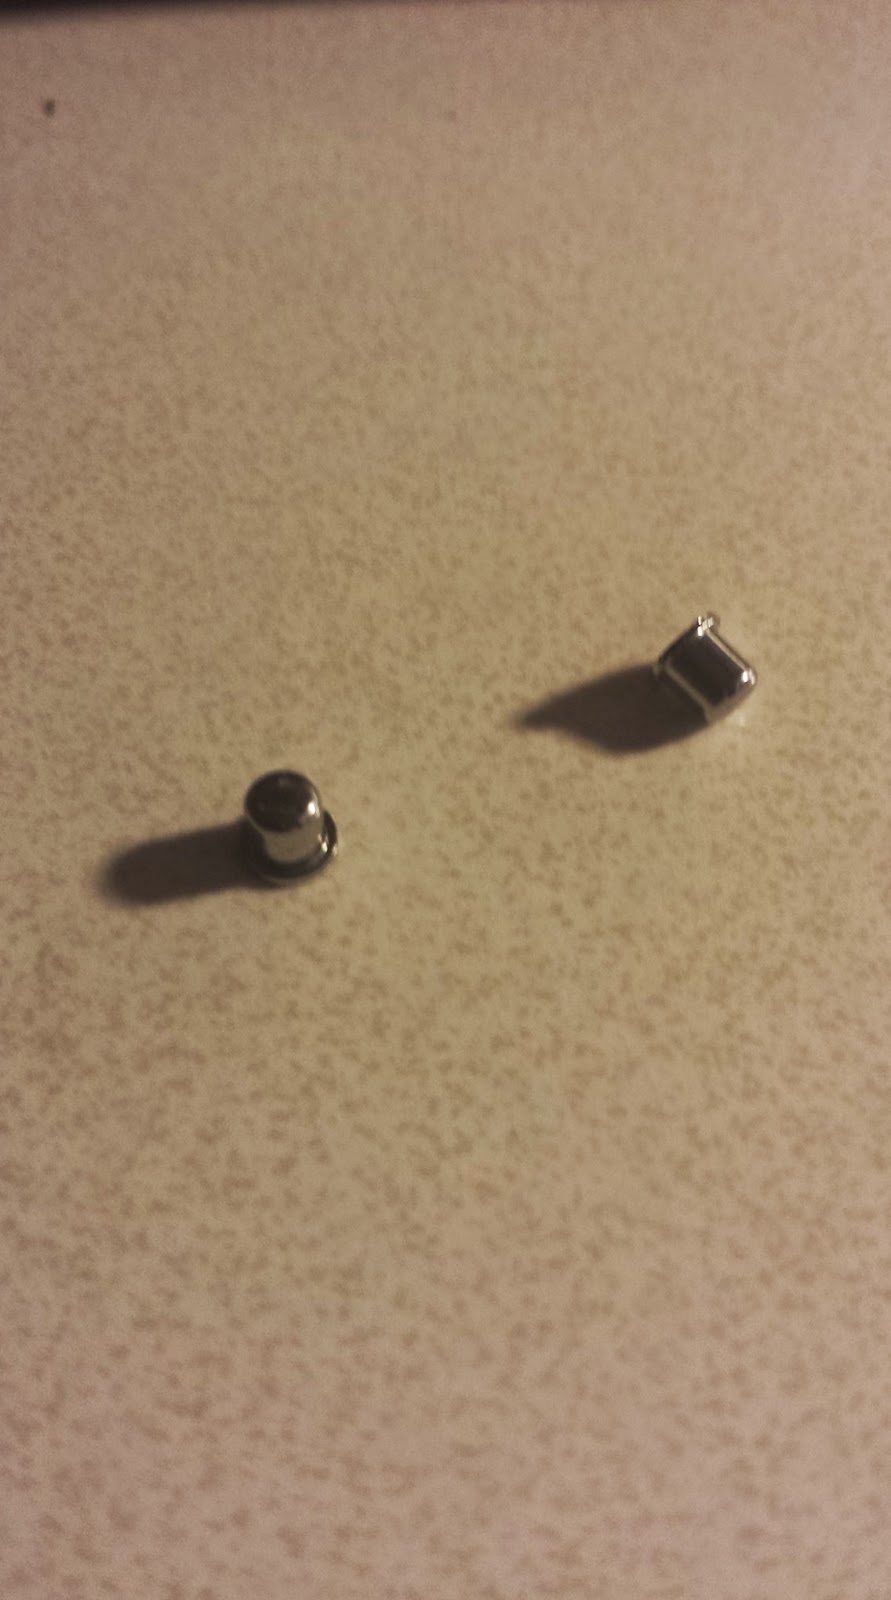
And finally for the one little piece that I actually wanted. That tiny little clear, circular lens on the right middle of the picture. YAY!
-------------------------------------------------------------------------------------
Step 4: Preparation of the Materials for Assembly.

First, I attempted to cut the plexiglass into the sizes that I needed. It is 8"x10" and I needed a 7"x7" and a 7"x3". I started by measuring a 1"x10" rectangle off the side.
Gary Reef (of Youtube) showed me how to cut and work with plexiglass. Thanks dude!

I didn't have a big box cutter like he did, but he called it an X-acto knife, and I had one of those so I thought it was worth a shot. The last inch of plexiglass was just going to be used as slides for help me tie in a political message, so I felt that making them uneven wouldn't be as big of a deal as messing up the slide holder or main base plate.

I tried using my Swiss Army knife too.... It basically didn't do anything.

After all the attempted cuts, this is what it looked like. You can't tell that much, but the lines are pretty jagged. My plexiglass was also about 2mm thick, so I thought that I would just do a couple more than he did and I would be able to break it. By my phrasing, you can probably tell that this was not the case. Possibilities: (1) The X-acto knife was too weak/not sharp enough, (2) I was not tracing in a perfectly straight line... it's harder than it looks, (3) I was not strong enough with the knife or trying to hit it off the side of my desk. In any case, it didn't work and I was ready to give up that method.
This gentleman, MissouriOldTimer, showed how to cut plexiglass with this oscillating tool. I did try to use that in the MakerSpace, but I found that it wasn't doing much of anything. It ended making a really thick rounded cut. It appeared as though it was melting the plexiglass more than it was cutting. I only did that for a small corner before someone in the MakerSpace suggested that I use the Laser Cutter.

Someone there helped me set up the software so that it would make straight cuts at the dimensions that I wanted.

Here's a picture I drew to show her what I ultimately wanted to result from the laser cutting of my plexiglass into the separate pieces.

I placed my plexiglass into the machine with a sheet of plastic underneath it. It kind of looked like a sheet protector or the sheets you use to laminate things with. I put that under the plexiglass so that the comb pattern at the bottom of the laser cutter (you can see it in the picture above) didn't transfer to my plexiglass sheet. Someone there suggested that since that had happened to him when he had cut his plexiglass. He said he though it was from the smoke that was generated due to the heat of the laser and the melting plastic. I was really appreciative that didn't happen, since there wouldn't be much point to have the glass colored/tarnished, since you need to be able to see through for the microscope to be functional.
It's hard to see in the picture above, but I had already drawn the lines on the plexiglass for where I wanted the cuts to be made. I made sure it was oriented in the correct direction and the staff member that helped me with the software checked points on the sketch to make sure that they were lining up with where I wanted my cuts (a laser pointer/red light shined down on the point she clicked on and it lined up with the lines I made on the plexiglass with sharpie). The material inputted into the machine was acrylic and the width was inputted as 2mm.
After the software/program was set up, I closed the lid, turned on the machine next to it (had to do with exhaust), pumped the petal underneath the laser cutter machine and pressed play on the computer that had the software. It took less than a minute to cut, but we waited a moment before opening the lid because of the fumes and the bad smell created by burning plexiglass.

This was the finished product. The lines were cut super straight, but the edges were tarnished a bit with a yellowish color. I'm not sure if that was due to the plexiglass burning or the sharpie marker. Either way, I was happy that the yellow marks were kept to a minimum and only on the sides.

In this picture, you can really see the dark yellow/brown tarnishes.
Next, was drilling!
Unfortunately, I don't have any pictures or documentation of me drilling because I was focused more on not injuring myself or anyone else than documentation. I also didn't have anyone with me to take pictures of me, but there were some complications that I ran into while figuring out the drill.
First, I wasn't sure if what I picked up was actually the drill. I found the bits, and they were all labeled with their widths (thank goodness). I picked out the 5/16" one, since that matched the size of my nuts, bolts, and washers. I wasn't sure how to put the bit into the drill though and was kind of freaked out about breaking something (and looking like an idiot) so I asked one of the staff members to help me. The one that had helped me with the laser cutter was the closest. She also didn't know how to do it, so I didn't feel as bad. We went to another staff member who was there to help us.
 He showed both of us that there were three regions of the bit: the chisel edge (the tip that centers the drill), the flute (the cutting edge), and the shank (which holds the bit into the drill).
 He then pointed out that the top of the drill, where the shank should fit in, screws open or shut. He opened the teeth wider and fit the 5/16" bit into the head and then twisted it so that it fit back into place.
 He also noted that the top had numbers on top indicating the torque selection/clutch setting. He said to keep it at the picture of the drill bit (looks twisty).
After messing with it for a while and finally (thinking) I had it figured out. I had the two sheets of plexiglass lined up on top of the wooden base. I started drilling, but felt that I was making no progress. I tried to push down harder, thinking that maybe I wasn't holding it correctly. It was taking a really long time and the top sheet of plexiglass kept moving. I removed it so that I could focus on lining up the two main pieces (the 7"x7" plexiglass sheet and the 7"x7" wood base).
I continued to drill. I thought that it should be going faster, but I didn't know what else to do. I finally got through the (2mm) plexiglass for one side. It felt like I had basically melted through it to get the hole (but hey, at least it was done). I continued onto the next side and got through faster. Finally, I got tired since it seemed like the drill wasn't going through the wood at all. I tried playing with something and for some reason decided to move the button with a little drill on it to the other side.
 The button that can make or break your drilling experience. I put a circle around it in white. UGHHHHH. Well, now I know, and you know. Apparently it changes the way that they drill spins. It made a big difference. When I tried drilling again and got through all eight holes within a couple of minutes. It felt like getting the others took over half an hour. I was frustrated, but at least I know not to make that mistake again.


Unfortunately, I don't have any pictures or documentation of me drilling because I was focused more on not injuring myself or anyone else than documentation. I also didn't have anyone with me to take pictures of me, but there were some complications that I ran into while figuring out the drill.
First, I wasn't sure if what I picked up was actually the drill. I found the bits, and they were all labeled with their widths (thank goodness). I picked out the 5/16" one, since that matched the size of my nuts, bolts, and washers. I wasn't sure how to put the bit into the drill though and was kind of freaked out about breaking something (and looking like an idiot) so I asked one of the staff members to help me. The one that had helped me with the laser cutter was the closest. She also didn't know how to do it, so I didn't feel as bad. We went to another staff member who was there to help us.


After messing with it for a while and finally (thinking) I had it figured out. I had the two sheets of plexiglass lined up on top of the wooden base. I started drilling, but felt that I was making no progress. I tried to push down harder, thinking that maybe I wasn't holding it correctly. It was taking a really long time and the top sheet of plexiglass kept moving. I removed it so that I could focus on lining up the two main pieces (the 7"x7" plexiglass sheet and the 7"x7" wood base).
I continued to drill. I thought that it should be going faster, but I didn't know what else to do. I finally got through the (2mm) plexiglass for one side. It felt like I had basically melted through it to get the hole (but hey, at least it was done). I continued onto the next side and got through faster. Finally, I got tired since it seemed like the drill wasn't going through the wood at all. I tried playing with something and for some reason decided to move the button with a little drill on it to the other side.


You can see the pencil lines that I drew on my base to help me figure out where I should drill the holes. I drew a centered 7" x 7" square onto the base. I then measured two adjacent points to be 3/4" away from the two corners. I marked the locations with an 'x'. The last point was equidistant from each edge and was also 3/4" from the edge of the base.

Although I had some issues with the drill, I eventually figure it out and lined up the plexiglass sheets and wood base. I drilled the holes through on the three points. The top plexiglass sheet has the same drill holes as the wood base, but the slide stand only has two drill holes.

Here you can see that my drill holes are relatively lined up, but not entirely perfect.

This picture gives another perspective for how the three sheets aligned together.
-------------------------------------------------------------------------------
Step 4: Assembly of all the Pieces of the Puzzle.

Screwing in the carriage bolts into the base.

The struggle... the nut doesn't screw all the way in.

All three carriage bolts are inserted.

Washers and nuts added to each carriage bolt.

Close-up shot of the parts added to the assembly so far.

Addition of two wing nuts and washers to the two top carriage bolts show where the slide stand will be held.

Addition of the slide stand.

Addition of three nuts to the carriage bolts.

Addition of the top plexiglass sheet.

This shows that the two plexiglass sheets are not entirely parallel with one another.

Complete assembly of all of the parts together. The last three nuts have been added to secure the top plexiglass sheet.
--------------------------------------------------------------------------------------
Step 5: Adding a political statement
Like I discussed, there would be more ideas on how to incorporate feminism into my project.

I went back and painted the base of the microscope black so that there was a consistent background. I also felt that it looked more sleek and polished.
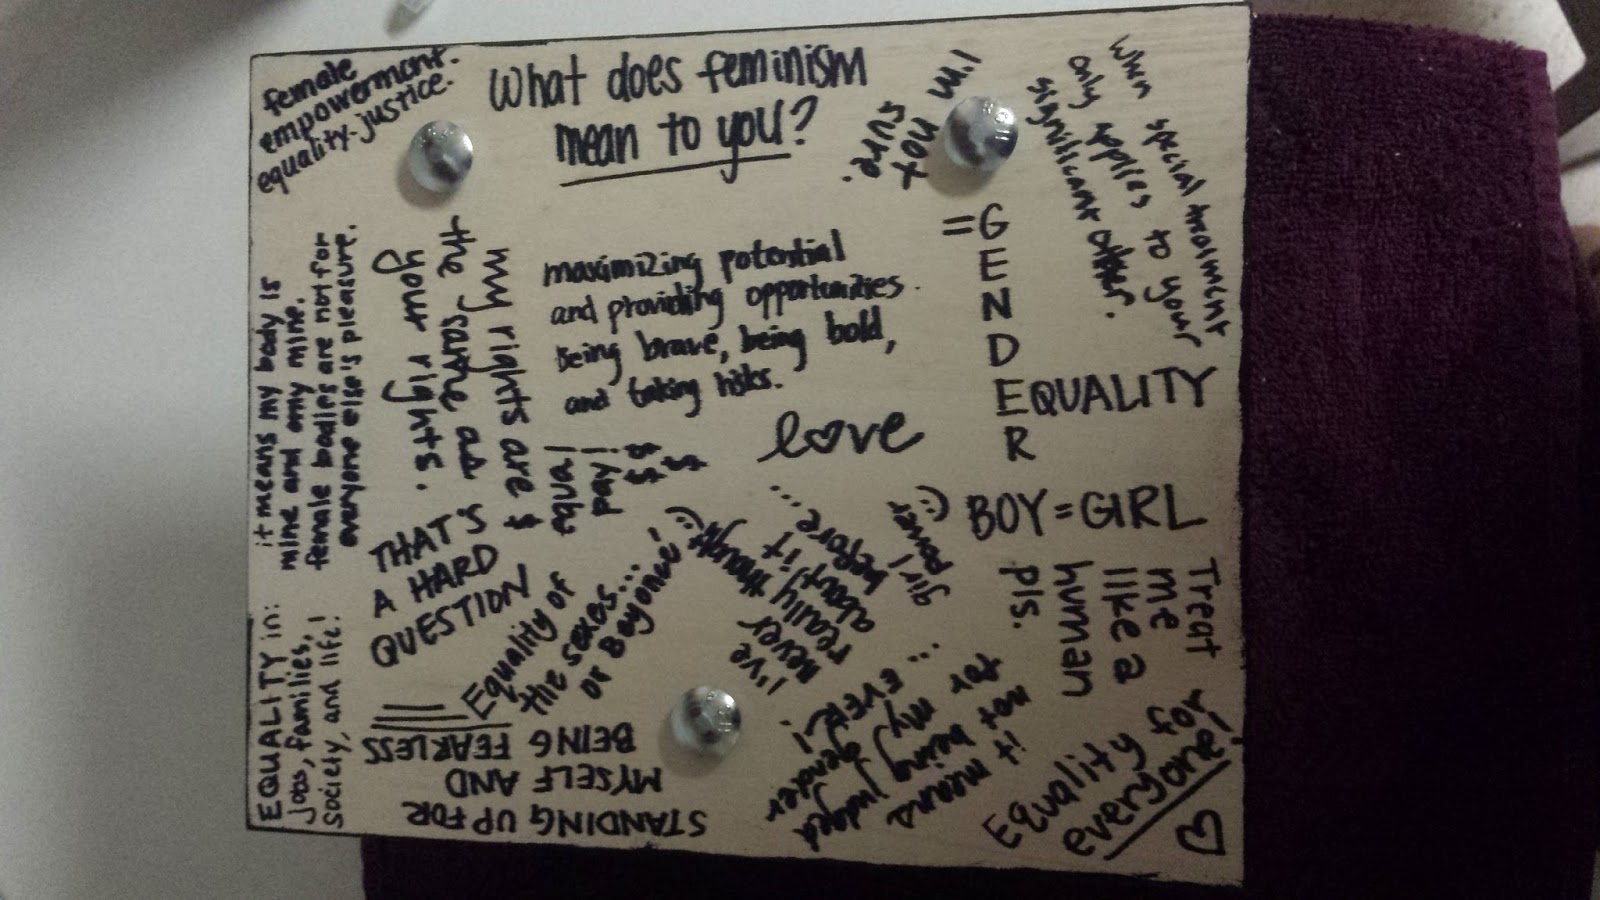
I asked all of my friends to write what feminism meant to them on the bottom of the base of the microscope so that it was really examining feminism. Although I wanted to represent my ideas of feminism and make sure that the ideas were correctly expressed, I realized that there was no "right" idea. I also liked seeing what people contributed and how hard it was for some people to document what feminism meant to them. This is a less visible part of the project and to me it really represents feminism from my peers' viewpoints. Their opinions for the most part remain relatively unseen and unspoken, but this allowed them to express their thoughts, and now they can be seen if you take the time to look at the bottom of my microscope project. I think that the social aspect of this step was really meaningful and the act in and of itself forced my peers to think about what feminism was, how it affected them, and their interpretation of what it meant to them or society.
----------------------------------------------------------------------------------
Step 6: Going Back for Finishing Touches.
At this point, I still had not drilled a hole for the microscope's lens. I had forgotten to take the measurement of the diameter of the lens and so I did not know how big of a hole to drill.

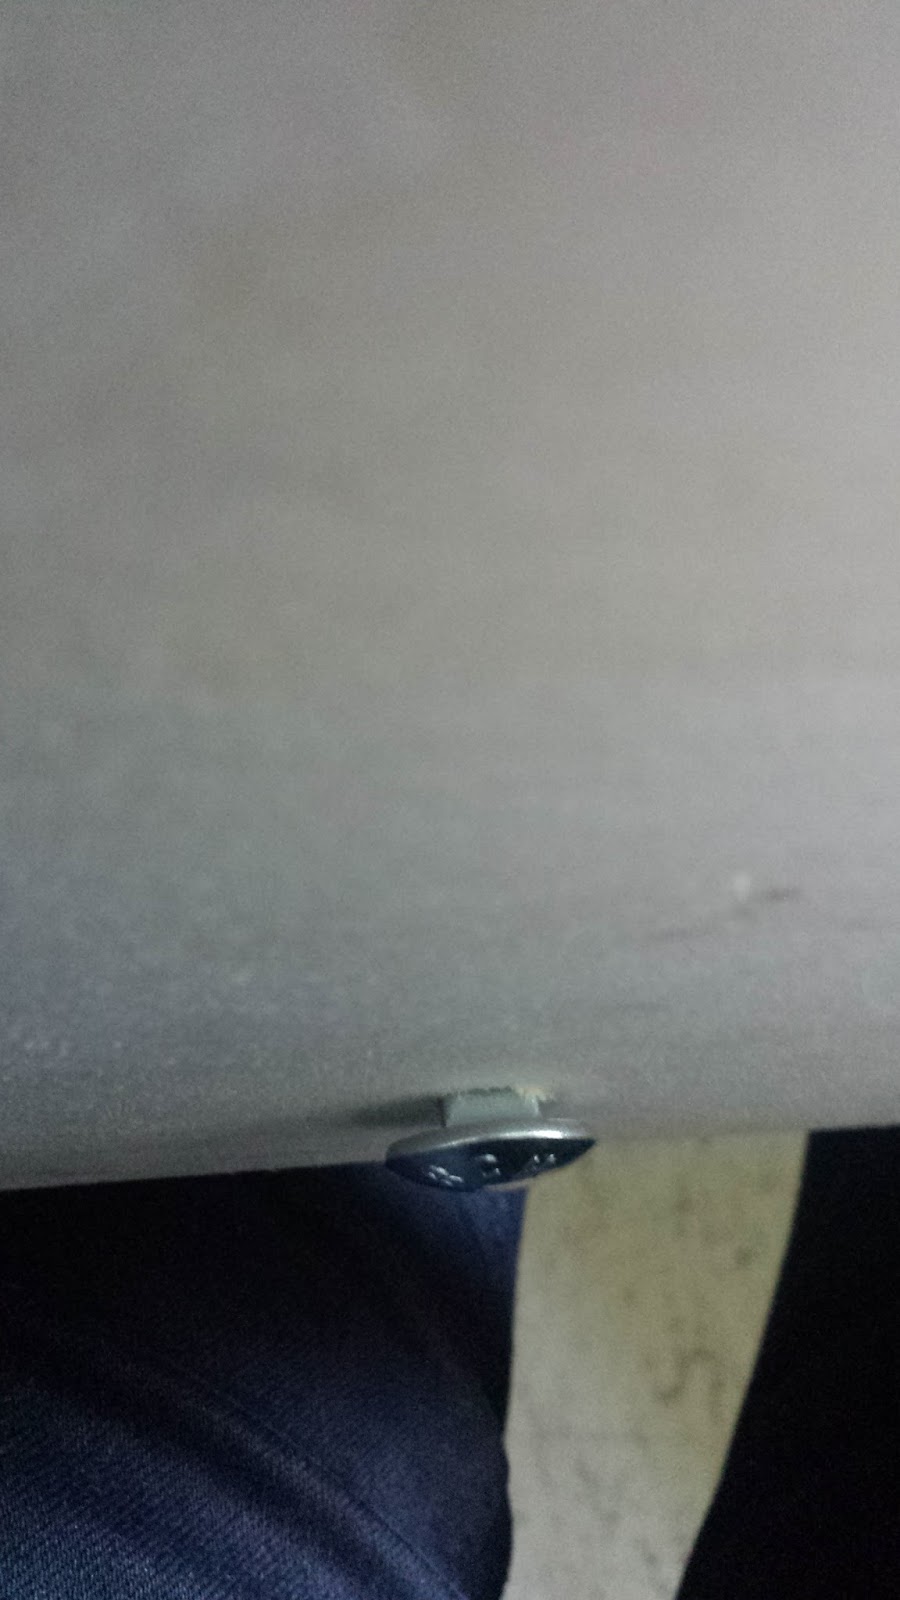
I finally got a picture of the real drill that I used in the MakerSpace with the drill bit that I used to drill the top platform of plexiglass with for the lens hole.

I measured the lens to have a diameter of 3/16", so this was the bit size that I used. I pushed the lens into the hole that I had created for it and it seemed to fit relatively well. I removed the lens again (for transportation purposes) and took it back to my room. There I tried replacing the lens.

The lens did fit into the hole, but when I tried using the lens, I could not get it to focus. It was a lot harder than expected or anticipated. (This is trying to focus on a sticky note that says "diameter".

This lens sadly fell into a hole under my window sill in my room in Haggett. It is now lost forever, so I will have to go get another laser pointer soon...

With the last 1" wide strip of plexiglass, I decided to continue to try to make slides out of them. I got a new box cutter, which made cuts a lot better than the X-acto knife I was initially using.

Half of the 1" strip of plexiglass. (I had already cut it in half).

Quarter pieces of the original strip. The box cutter was significantly more successful in cutting through the plexiglass. I think that the length of the strips compared to the short width also gave me more leverage when hitting the pieces off of the side of the desk to break them off where I had created a cut.

I tried to make four slides, which I did, but they are pretty uneven due to my lack of accuracy in just "eye-balling" the distances.
My next goal is to transfer pictures of prominent female figures, symbols that represent feminism, and issues that feminists have fought against or that females have faced in society in order to tie in the theme of "looking through the lens" and magnifying these topics so that they are more prominent and widely known and acknowledged. I think that awareness is one of the major keys to success in a movement, and so I think that this would be a really great way to represent this topic, which is so relevant to my everyday life.
No comments:
Post a Comment